How To Remove Viking Oven Door | 6 Straightforward Steps
Heating your food is a challenge that all cooks face when preparing meals, which is why Viking appliances create easy-to-use and effective cooking appliances. However, if you’re planning to remodel your kitchen or simply want to clean out the debris around your oven, you might be wondering how to do a quick and painless job by removing the oven components, like the oven door.
It is apparent that the Viking oven door is made of metal and can be heavy enough. So, it can be hard to remove it yourself. Having said this, here comes another question concerning how to remove a Viking oven door safely. Don’t worry. There are many ways that you can use to remove a Viking oven door without hurting yourself or damaging your appliance in the process.
How Ro Remove A Viking Oven Door
It can be tricky to remove your Viking oven door because of its heaviness and complex design. Don’t worry though, we are here to help. Now, we will explain how you can easily take off your Viking door in some simple steps. Just follow the instructions here, and you’ll have it working correctly again in no time.
Step 1: Open The Door
To open the door, you will need to push or pull with your hands. You can do this by pressing on the handle, which will raise the latch. If you have a high-end Viking oven, it may be easier for you to grasp the handle and pull it toward you. You could also use both hands together to lift the latch. If your Viking oven has an older design, then we recommend taking hold of one side of each handle and pushing them away from each other so that they disengage from their respective locking mechanisms.
Step 2: Slide the Handle Out of the Slot
First, slide the handle out of the slot and slide it up so that it goes out of the door. Then, lift the handle up and out of the door. Using a flat-head screwdriver, insert the tip under either side of the handle and pry up. Now, use the flathead screwdriver to lift the handle out from the door.
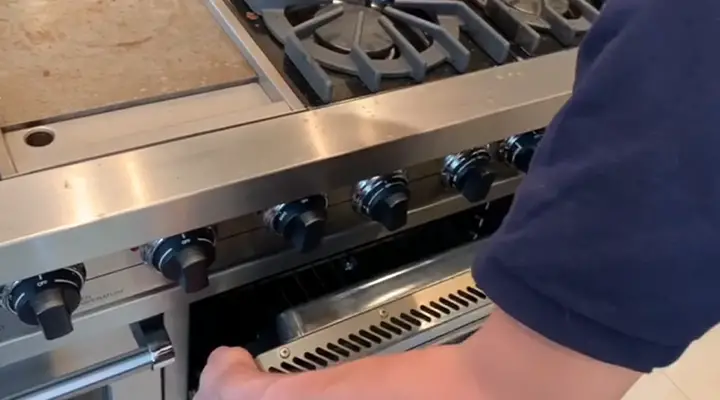
Step 3: Remove the Screws
The next step is to remove the screws that hold your Viking oven door in place. There are usually four of them, although this will vary based on the model of your stove. You can use the Philips screwdriver you bought at the home improvement store to unscrew them.
You should put the screws in a safe place so that they don’t get lost when you take out the door and then reinstall it later. A good idea is to use an old plastic container with a lid. But if you don’t have one lying around, put them on top of something metal like a cookie sheet or frying pan so that they’ll stick there until you need them again.
Step 4: Pull the Bottom of the Frame
To remove the bottom from the frame, use a screwdriver to unscrew four screws on each side and pull them out. You will also need to remove two clips that hold it in place at either end. Use a flat head screwdriver to push them out from their slots on either side of your oven door frame.
Step 5: Take off the Hinge Cover
Firstly, take off the top hinge cover. Remove the screws from both sides of the door and lift it away, exposing a hinge pin and cover on each side of your oven. You’ll need to remove these before you can get to your hinges. Using needle-nose pliers or other small pliers, remove each hinge pin by grasping it with one end of your tool inserted into its hole. Then pull toward you until it comes loose. You’ll have three to remove using the same process. Be sure not to let go of your tool as you do this.
Step 6: Remove Both Sides of the Glass Panel and Set It Aside in a Safe Place
To remove the glass panel, you’ll need first to remove both sides of the glass panel. Each side has a hinged cover on it, so you’ll have to take those off first. The top hinge cover is held in place with two screws, which can be accessed by removing the stainless steel trim piece that runs along the front edge of the door opening.
Once this trim piece is removed, you should be able to get a grip on the top hinge cover and pull it out carefully. You may need to pry it up at an angle so that it doesn’t come loose from its housing. However, there is less risk of breaking anything.
Next, remove any screws that are holding down your bottom hinge cover plate. This task will also likely involve removing some rubber grommets. Then gently pull out each side of your oven door, so they’re not touching anything anymore and set them aside in a safe place. Now, you’ve removed your Viking oven door safely!
Final Speech
As can be seen, removing the oven door is an easy process and requires only a few tools. The process is the same for most models, though you may have to consult your manufacturer’s manual if your oven has unique features. Removing the door is not dangerous or complicated and can be done in less than an hour.
In the first place, turn off all power to the appliance at its breaker box or fuse box before removing any covers or panels that expose live electrical connections or wiring. Unplug your stovetop unit from its electrical outlet and remove any screws holding down hinges. Here, use a flathead screwdriver according to the above guide so you don’t scratch adjacent surfaces behind and safely finish the removal process.