How to Build Support for Wall Oven?
Nowadays it is quite challenging to cook fast without an oven. But it can be a problem when you do have not enough space in your house to place your oven. However, when you want to have an oven but there is no space for the oven in your house, you can apply the innovative idea by using the oven on the wall.
Though a wall oven can save space and make the kitchen tidy, it is necessary to keep track of some things. You have to build support for your wall oven. In this article, you will get a through knowledge about the topic.
How Can I Build Support for My Wall Oven?
A wall cabinet can support your oven very perfectly. Generally, the infrastructure of a wall oven relays on the shape and size of that oven. But some constant matters can be applied to every wall oven panel. Some basic things are the same for all wall oven cabinets, even though building support for wall ovens will vary due to their dimensions. Each of them has storage space above and below the oven that can be customized to the user’s needs.
Besides, many kitchen cabinets have four to five shelves with a backplate. You can keep the necessary accessories in the accessory portion.
So, let’s check the process by which you can build support for the wall oven.
◙Position the two 84-inch end panels on the work table to begin the process. Mark about four inches at the beginning and end of the measurement. The perpendicular edge should be repeated as well. Mark the marks with the framing square and draw intersecting lines.
◙Consequently, a square of 4 inches will appear at the corner of the plywood. On the second piece, repeat the same process, and then cut out the squares with a skill saw. Glue the area behind the cutouts and then attach the 4 by-19-inch pieces with box nails. Use a damp cloth to remove any excess glue.
◙Once you have measured from the top edge of the plywood, make marks at 28 and 73 inches. Draw a line from the corner of the framing square across the width of the ending panel. Marking an X on the lines will help indicate where the shelves will be installed.
◙Attach the shelf supports to two of the 23-by-28 shelves with drywall screws using glue on one of the long edges of one of the shelf supports. These two shelves are the center shelves. Glue the 23-inch edges of the shelves, position them on the lines and use finished nails to attach them to the end panels.
◙Flip the wall-oven cabinet over so that the toe-kick cut-out faces downward. Place the plywood 30 by 80 inches on the cabinet and fix the edges with glue and box nails.
◙The two end face frame pieces should be positioned on a flat table so that the long edges are adjacent. Mark 28 and 73 inches starting at one end Mark the framing square over the marks, as well as draw a line across the width of the 2 pieces. Glue now the bottom and top rails.
◙Glue the end edges of the bottom rail and one of the top rails now. Make sure the 1-by-2 is positioned exactly at the bottom of the cabinet, which is the toe-kick end, and also at the other end. To secure the pieces, use the corrugated fasteners. With a damp cloth, remove any excess glue.
◙Observe that the toe kick faces the up direction now that the oven cabinet has been turned over. Place the 4-by-by-30-inch plywood over the toe-kick cut-out, then glue and nail the plywood in place. Use drywall screws to attach the 4-by-4-by-inch block to the bottom of the bottom shelf right behind the toe kick. The top of the bottom shelf should not be punctured. Put two finish nails in the toe kick of the block.
◙Lastly, apply glue to both the edges of the wall oven cabinet, as well as the face frame. Using the finish nails, secure the frame to the cabinet. Make sure all the nail heads are positioned correctly and then fill the holes with wood putty.
Can a Wall Oven Sit on Plywood?
Please make sure that your wall coverings, counters, and cabinets can take this heat. You can proceed if you are sure that the materials surrounding you can withstand the heat, for the opening that will hold the oven, use the same plywood that you use for your cabinets.
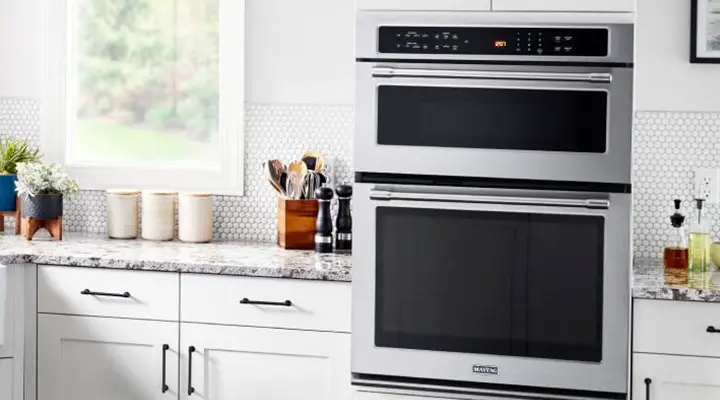
How Do You Build a Double Oven Platform?
Check the installation instructions for your chosen oven model first. It will specify the exact dimensions of the oven and the requirements for the cabinet. Generally, ovens have a width between 24 inches and 36 inches, and their depth is between 24 inches and 28 inches. It may also be necessary to provide a minimum space in front of the unit for operating the doors, as well as a suggested distance from the floor or ceiling. The door opening space for this door may measure about 21 inches, as explained by Home Depot.
Step 1. Prepare the worktable for the 83 3/4-by-23 1/2-by-3/4-inch plywood cabinet sides.
Step 2. Using the box nails, fasten the 19 1/2-by-4-by-3/4-inch plywood pieces behind the cutout.
Step 3. The cutout should be visible from the front when one of the cabinet sides is up. Glue the front edges of the cutout.
Frequently Asked Questions
What Does a Wall Oven Sit on?
In a cabinet or built-in section on a wall, wall ovens should be mounted. Ensure that the appliance has access to a power outlet that can supply enough power for it to function. It is not recommended to place the appliance on the floor or in an unrecommended area.
How Do I Secure a Wall Oven?
Position the oven enclosure so that the flange is against the cabinet face and lift and slide the oven into it. Use a 1/8-inch drill bit to pre-drill each of the four mounting holes, then tighten a mounting screw through each hole to secure the oven to the wall.
Conclusion
To get all the details and information that this guide may not cover regarding appliance installations, it’s important to read your owner’s manual and installation instructions. If you’re not familiar or comfortable working with electrical wiring, hire a professional electrician. Since a wall oven is a smart choice in the running world, so you can use it at your home to save space. Moreover, when you set the wall oven with the help of an expert it will be placed conveniently based on proper measurement.