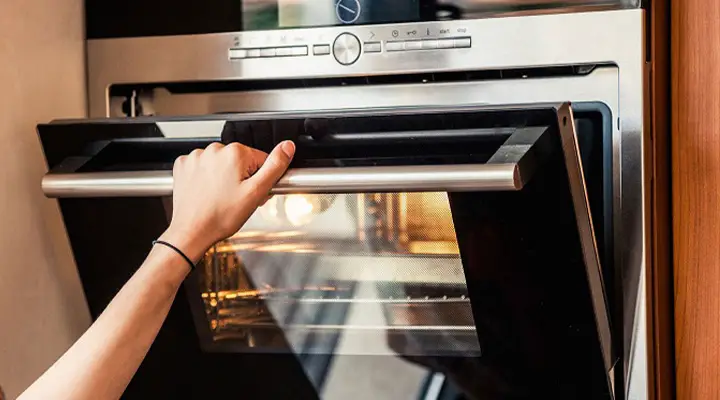
How to Open Pine Cones Without Oven?
During hot and dry weather, pine cones open, while during cold and wet weather, they close. However, its function is largely unknown. It is related to seed development. All coniferous trees appear to do this and it is believed to aid in reproduction. There are several possible explanations as to why cones may open during periods of hot or dry weather.
In this article, we’ll cover some of the best methods for not only cleaning and debugging pine cones, but also drying, opening, and even storing them.
Can Pine Cones Be Opened Without an Oven?
Using pine cones in crafts, weddings, and even home decor are a few ways to use them creatively. You’re in the right place if you need to know how to clean pine cones for craft projects. No matter what kind of crafts you need or what kind of decorations you wish to make, pine cones are a great resource. The pine cones need to be cleaned and prepared before you bring them into your home.
Fortunately, it is simple and quick. Today I am going to provide you with some tips and tricks that you need to know before you store pine cones.
⦿Getting wet will cause the pine cones to close up tighter. As the cones soak up water, you will notice that they begin to close up. They should be removed from the oven and allowed to continue to dry overnight.
⦿It takes about an hour to bake pine cones. It will only take a few minutes for them to soak, and then they can be baked. The pine cones are now open again. TA special tool is not required for this task.
⦿Pine cones release their seeds when they are warm and dry. It is recommended that they be left to dry overnight. You can easily open or close pinecones with water and place them in the oven or a dry, sunny area if you prefer.
⦿People who aren’t familiar with the cone’s property that it closes and opens based on humidity are often surprised by it. We’ll soak small cones in water until they become closed. Following that, we’ll clean them and put them into wide-mouthed bottles and jars.
⦿After that, let the cones dry at room temperature for a few days until all the water is absorbed and the cones are open. Wait a few days for the water to evaporate so the cones can open up. You should close the bottles after opening the cones so that moisture won’t get into the bottles and cause them to close again.
⦿The pine cones can be sprayed with clear acrylic spray, polyurethane, or spray varnish after they have dried, been debugged, and opened. Be sure to coat the bottom of the pine cone well (don’t forget the top). It does not have to be a heavy coat.
How Do You Force a Pine Cone to Open?
Using pine cones to decorate for the holidays adds a natural, fragrant touch. Wreaths and swags will look more “down-home” when these centerpieces are arranged alongside evergreen boughs. In the fall, you can gather fallen cones along roadsides after they have fallen from trees. It is unfortunate that those that you find are often closed and cannot be displayed unless they are forced to open.
Step 1:
Collect pine cones from the outdoors. There are different types of pine trees and each type has a different type of cone. Visiting a nearby park could be the best option if you want to collect pine cones.
The pinecones I collected from my yard made up an entire bag. It would have cost me a good deal at the store to buy just one small bag of pine cones, so I saved a lot of money on it. You should brush off any visible dirt or debris while collecting pine cones. By doing so you will be able to save time later on.
Step 2:
Prepare the bucket by filling it with warm water and vinegar (1/2 cup to 1 cup). Allow the pine cones to soak for about 15 minutes in the bucket of water after you have collected them. Bugs hiding in pine cones will be killed by this process.
You might want to soak your pine cones in hot water with 1-2 cups of vinegar if they are covered in a lot of sap. In addition to the water and vinegar, you can add dishwashing soap. Let the pine cones drain all of the excess water in a colander or strainer after you’ve removed them from the water. Unless your pine cones completely close upon soaking, there’s nothing to worry about. They will do that naturally. Afterward, they will reopen beautifully and you can bake them again.
Step 3:
Consider skipping this step if your pine cones look good and you plan to use them in another way. Brush any dirt on each cone (or whatever scrubbing tool you have) away with an old toothbrush (or whatever scrubbing tool you have). Using paper towels, gently pat the pine cones dry after you have finished scrubbing them.
Step 4:
Pine cones can be left out to air dry outside on a flat surface or a cookie sheet covered with paper towels or parchment paper for a couple of hours. Even if you do not air-dry your pine cones, it is not going to ruin them, but I feel that air-drying them before baking them is the best method for creating crunchy pine cones.
Step 5:
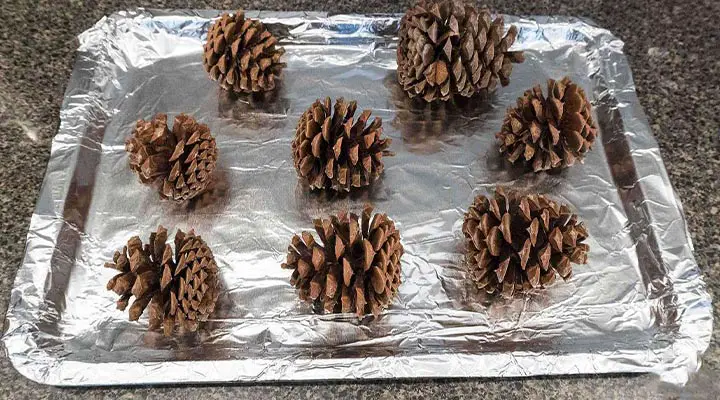
Your oven should be preheated to 200°F. Lay out pine cones in a single layer on a baking sheet. To prevent the pine cones from sticking, line the baking sheet with aluminum foil or parchment paper. Baking sheets with flat surfaces are not recommended. You should choose one with a rim. If your pinecones fall inside your oven, you’ll have a problem.
Approximately 2 hours of baking are required, with turning halfway through. Any bugs hiding inside the cone will be killed as well as some moisture will be released. Your house will smell amazing as you bake pine cones! You will also see your closed pine cones magically transform into open ones.
You will also see a beautiful glaze appearing on your pine cones if you still have any soap residue left on your cones. Before decorating or crafting with pine cones, allow them to cool completely.
Can Pine Cones Be Microwaved to Remove Bugs?
The microwave method should not be used in this case. My microwave has never been used for this before. In my experience, it is better to debug and dry out pine cones in your oven. The result is much better and safer when using this method.
⦿Several cookie sheets will be needed for this task. You will need aluminum foil for each cookie sheet.
⦿The pine cones should be arranged evenly between the cookie sheets.
⦿ Space your pine cones out. During this process, they will expand and open up.
⦿The oven should be set at 300 degrees.
⦿After 30 minutes, check the pine cones. Drying, expanding, and opening up are the signs that you need to watch for.
⦿It’s time to remove the foil from the top of the cookie sheet when the pine cones have opened.
⦿The pine cones should be open when the foil is removed from the top.
⦿During this process, the pine cones will be baked and the tiny pests living within them will be destroyed.
Frequently Asked Questions
Is It Necessary to Clean Pine Cones?
Decorated by nature, they are an indispensable part of the Christmas spirit, a symbol of the real meaning of the winter holidays. Nevertheless, they need to be cleaned first before being used, especially pine cones. Before you decide to create decorations, you should follow a few excellent cleaning tips for pine cones.
Can Pine Cones Be Cleaned of Bugs?
To get rid of insects on pine cones, you can use a mild solution of vinegar and warm water. After soaking pine cones in white vinegar two parts water and to one-part white vinegar for approximately 30 minutes, they can be reused.
Do Pine Cones Dissolve in Cold Water?
When the water was cold, the blisters closed faster than when it was hot. Pine cones are like seeds because they open up to release their seeds when it’s warm and dry. Our students were fascinated by this fact. However, the scales close up when it’s cold or damp.
Do Pine Cones Need Heat to Open?
Pine cones open and close based on science. In response to changes in humidity, cones that bear seeds change their scales. Pine cones open up to release their seeds when they are warm and dry.
Conclusion
Pick up pinecones that have recently fallen. Rotten and insect-filled older pinecones can damage the lawn. Pinecones in the oven need between 30 minutes and an hour to dry depending on how much moisture they contain. Depending on how long it takes for the first batch of cones to open, the remaining cones will open at different times.
Make sure the temperature in the oven does not get higher than 200 degrees, as this can cause the oven to smoke or catch fire. When you are performing this task, ensure the oven is not left unattended. For maximum preservation, spray the pinecones with polyurethane, spray varnish, or acrylic spray once they are thoroughly dried and cleaned. Spray a light spray of water over the pinecone thoroughly.